
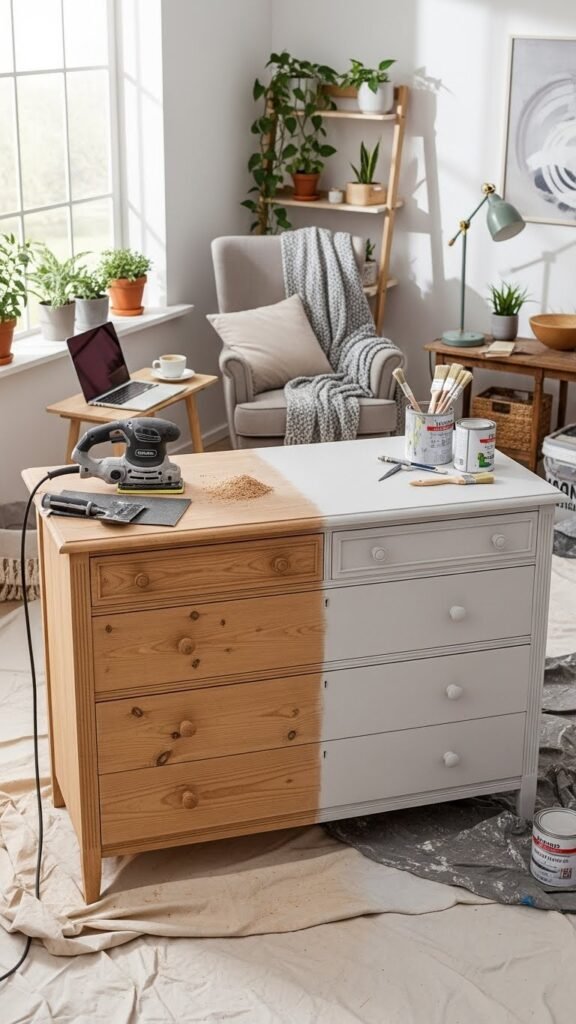
There’s something incredibly satisfying about turning a tired, scratched piece of furniture into something that looks fresh, modern, and expensive. You don’t need a huge budget or professional skills—just the right steps and a little patience. Painting furniture is one of the easiest ways to refresh your space and make old pieces feel brand new again.
Whether you’re updating a thrift-store find or reviving a piece you already love, this guide will walk you through the process in a simple, stress-free way.
Choose the Right Furniture for Painting
Almost any piece can be painted, but some are more beginner-friendly than others.
Great starter pieces include:
- Dressers and nightstands
- Side tables and coffee tables
- Wooden chairs
- Shelving units
Before you begin, check the furniture’s condition:
- Is it sturdy and stable?
- Are there loose joints or major cracks?
- Is the surface real wood, veneer, or laminate?
Don’t worry—most surfaces can still be painted. You just need the right prep, which we’ll cover next.
Prep Work: The Secret to a Professional Finish
Skipping prep is the biggest mistake people make. A smooth, clean surface is what makes painted furniture look polished instead of DIY.
What you’ll need:
- Mild cleaner or dish soap
- Sandpaper (medium and fine grit)
- A clean cloth or tack cloth
- Drop cloth or old sheet
Steps to follow:
- Clean the furniture thoroughly to remove dirt and grease.
- Lightly sand the entire surface to help the paint stick.
- Wipe away dust so the surface is completely clean.
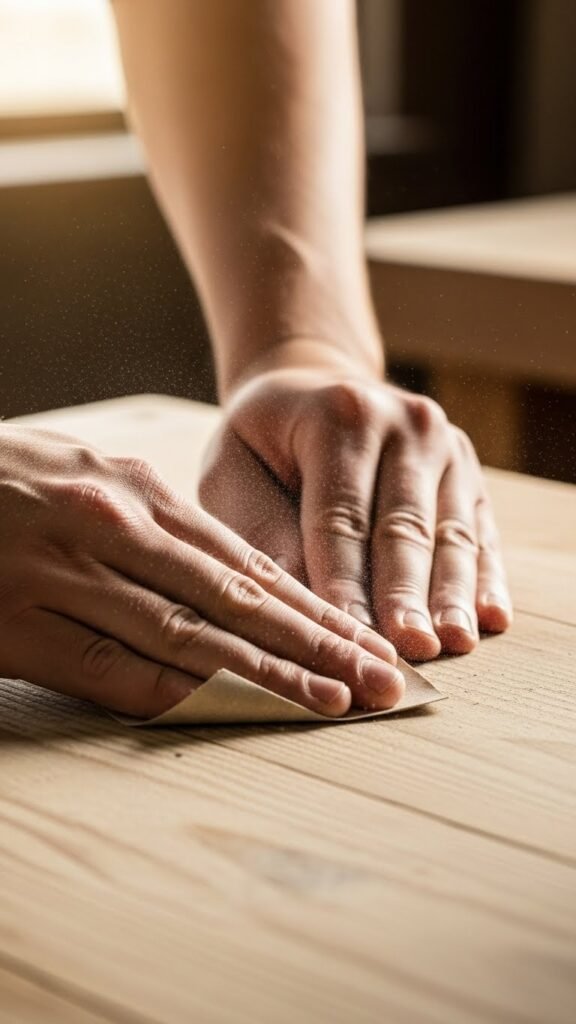
You don’t need to sand down to bare wood. A light scuff is enough to give the paint something to grip.
Pick the Perfect Paint and Tools
The paint you choose can make or break the final look.
Best paint options for furniture:
- Chalk-style paint for a soft, matte finish
- Satin or semi-gloss paint for durability
- All-in-one furniture paint for convenience
Essential tools:
- Quality paintbrush (angled works best)
- Small foam roller for smooth surfaces
- Paint tray
- Painter’s tape
Pro tip: Invest in a good brush. It reduces streaks and makes the process much easier.
Prime (When Needed) for Long-Lasting Results
Primer isn’t always required, but it’s a game-changer in certain situations.
Use primer if:
- The furniture is very dark
- The surface is glossy
- You want extra durability
Apply a thin, even coat and let it dry fully before painting.
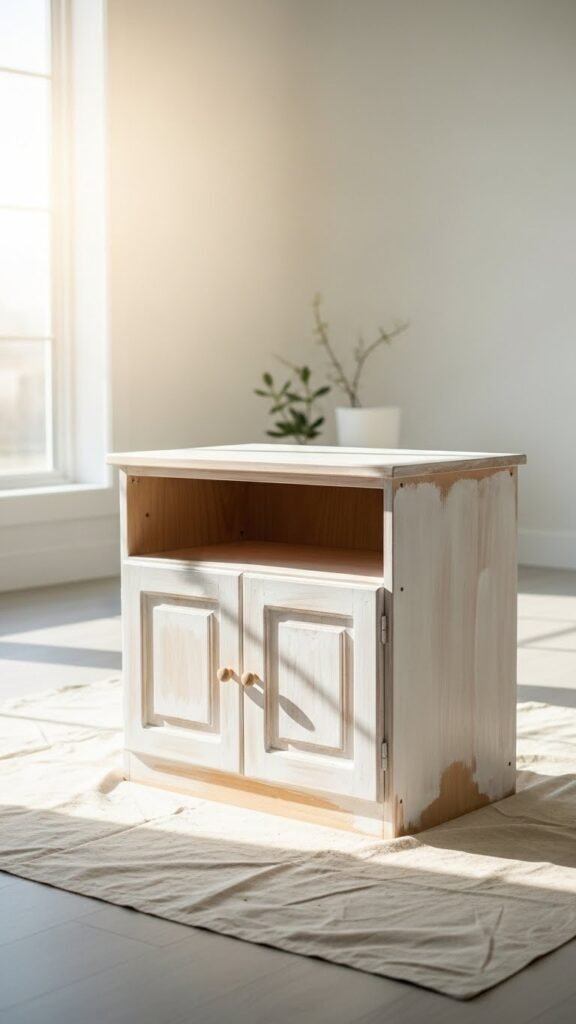
Primer helps prevent stains from bleeding through and keeps your paint color true.
Paint in Thin, Even Layers
Now comes the fun part—painting.
Follow these tips for a smooth finish:
- Apply thin coats instead of one thick layer
- Paint in the direction of the wood grain
- Let each coat dry completely before adding another
Most pieces need:
- 2–3 coats of paint
- Light sanding between coats if needed
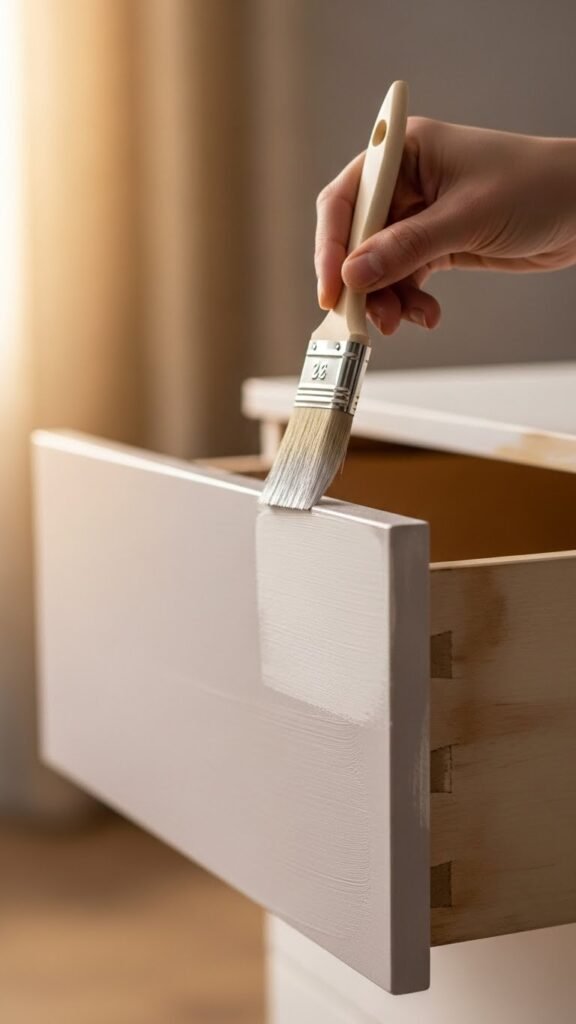
Don’t rush this step. Drying time is what gives furniture that clean, professional look.
Seal and Protect Your Work
Sealing your furniture helps protect it from everyday wear and tear.
Popular sealing options:
- Clear wax for a soft finish
- Water-based topcoat for durability
- Polycrylic for high-use pieces
Apply the sealer in thin layers and allow proper drying time before using the furniture.
Add Small Details That Make a Big Impact
Once the paint is dry, little upgrades can completely elevate the piece.
Consider:
- Swapping old knobs for modern hardware
- Adding decorative drawer liners
- Distressing edges lightly for character
- Styling with décor to highlight the transformation
These final touches are what make your furniture look thoughtfully designed instead of simply repainted.
Final Thoughts: Your Furniture, Transformed
Painting furniture isn’t just about saving money—it’s about creating something that feels personal and fresh. With the right prep, paint, and patience, you can turn almost any piece into a standout feature in your home.
Save this guide for later, grab a brush, and give that old furniture a brand-new life. You’ll be amazed at what a little paint can do.

Leave a Reply