
Macrame is having a serious moment—and for good reason. With just cord, knots, and a little patience, you can create textured wall hangings that instantly warm up a space. Whether you’re decorating a cozy apartment or adding character to a blank wall, macrame brings that relaxed, boho charm that feels both handmade and stylish.
[Image Prompt] A sunlit boho living room with a large handmade macrame wall hanging on a white wall, soft neutral tones, indoor plants, natural wood furniture, cozy textures, high-end camera, no text.
The best part? You don’t need to be crafty or artistic to get started. Let’s break it down step by step so you can make your own macrame wall hanging with confidence.
What You Need to Get Started
Before tying your first knot, gather a few simple supplies. Most are affordable and easy to find.
- Macrame cord (cotton is beginner-friendly)
- Wooden dowel, branch, or metal ring
- Scissors
- Measuring tape
- Comb or brush (for fringe details)
- Wall hook or nail (to hang while working)
Tip: Start with a 3–4 mm cotton cord. It’s thick enough to see your knots clearly without feeling bulky.
Understanding Basic Macrame Knots
You don’t need dozens of knots to make a beautiful wall hanging. Master just a few, and you’re good to go.
Essential knots to learn:
- Lark’s Head Knot – Used to attach cords to your dowel
- Square Knot – The foundation of most patterns
- Half Knot – Great for spirals and texture
- Diagonal Clove Hitch – Creates angled lines and shapes
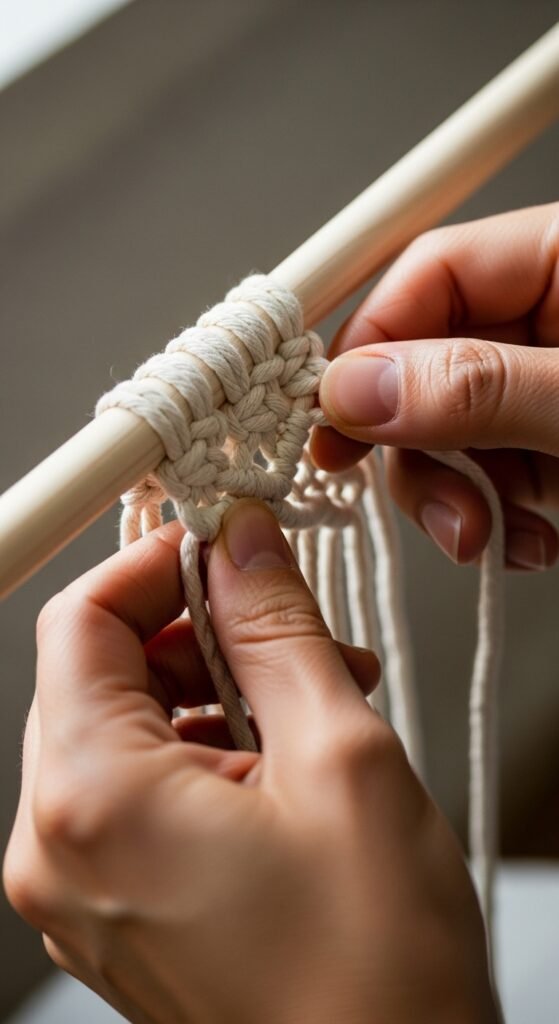
Practice these knots for a few minutes before starting your project. Muscle memory helps more than you think.
Step-by-Step: Making a Simple Macrame Wall Hanging
This beginner-friendly design is perfect for your first project.
1. Cut and Attach Your Cords
- Cut 12–16 cords, each about 4 times the desired final length
- Fold each cord in half
- Attach to the dowel using Lark’s Head Knots
Make sure cords are evenly spaced for a clean look.
2. Start with Square Knots
- Divide cords into groups of four
- Tie square knots across the row
- Keep tension consistent for even results
Work slowly. Neat knots make a big visual difference.
3. Create Texture with Alternating Rows
- Offset your next row by starting between previous knots
- This creates a diamond or net-like pattern
- Mix in half knots if you want subtle variation
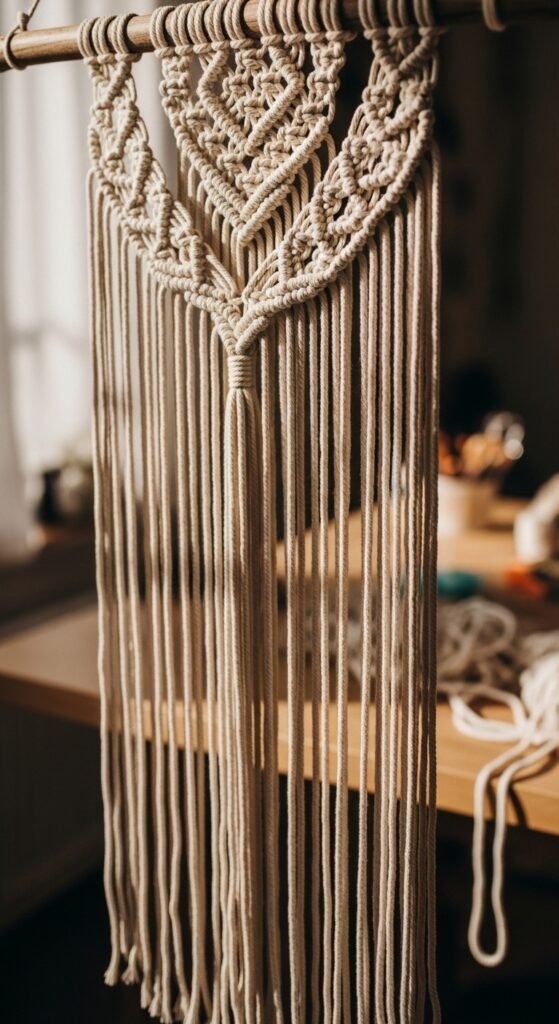
Adding Fringe and Finishing Touches
This is where your wall hanging really comes alive.
- Trim the bottom cords into a V-shape or straight line
- Use a comb to gently brush out the ends
- Trim again for a clean fringe
Want more personality?
- Add wooden beads
- Mix in thicker accent cords
- Layer multiple small hangings together
Small details elevate your piece from simple to stunning.
Choosing the Right Spot to Hang It
Macrame works in more places than you might expect.
Great spots include:
- Above a bed or sofa
- In an entryway
- Over a console table
- As a nursery accent
- In a cozy reading corner
[Image Prompt] Finished macrame wall hanging styled above a bed with linen bedding, neutral pillows, warm natural light, boho bedroom aesthetic, high-quality photo, no text.
Balance is key. Let your macrame breathe by keeping surrounding decor minimal.
Common Beginner Mistakes (and How to Avoid Them)
Even simple projects can feel tricky at first. Watch out for these common issues:
- Uneven tension → Pause and adjust as you go
- Cutting cords too short → Always go longer than you think
- Overcomplicating patterns → Simple designs look more polished
- Rushing the process → Macrame rewards patience
Remember, handmade charm includes small imperfections.
Make It Your Own
Once you finish your first piece, ideas start flowing fast.
Try:
- Mini wall hangings for gallery walls
- Seasonal color palettes
- Layered designs with different lengths
- Mixing macrame with mirrors or shelves
The more you practice, the more natural knotting becomes.
Final Takeaway
Macrame wall hangings are one of the easiest ways to bring cozy, boho style into your home—without expensive tools or advanced skills. With a few knots and a relaxed mindset, you can create decor that feels personal, calming, and beautifully handmade.
Save this guide, grab some cord, and start knotting your way to a warmer, more stylish space.

Leave a Reply