
Wallpaper can completely change a room—but only if it’s installed smoothly. Few things are more frustrating than stepping back and seeing bubbles, wrinkles, or crooked seams staring right at you. The good news? You don’t need professional tools or years of experience to get a clean, polished result. With the right prep and a calm, step-by-step approach, you can install wallpaper neatly and confidently.
[Image Prompt] A bright, modern room with partially installed wallpaper, a clean workspace, and smooth wallpaper panels being aligned carefully on the wall, soft natural light, realistic home interior photo.
This guide walks you through everything—from prepping your walls to smoothing the final panel—so you can enjoy the process without the mess.
Prep Your Walls for a Smooth Start
Wallpaper success begins before the first panel goes up. Skipping prep is the fastest way to end up with bubbles later.
Start by checking the wall surface:
- Remove nails, hooks, or adhesive residue
- Fill small holes or cracks with spackle
- Sand lightly until smooth
- Wipe the wall with a damp cloth to remove dust
If your wall has a glossy finish, lightly sanding helps the wallpaper grip better. For fresh drywall, apply a wallpaper primer or sealer. This creates an even surface and makes adjustments easier during installation.
[Image Prompt] A close-up of a hand sanding a wall lightly with fine-grit sandpaper, smooth neutral wall, clean and realistic home improvement scene.
Let the wall dry completely before moving on. Rushing this step often leads to peeling edges later.
Measure, Mark, and Plan Before You Paste
Wallpaper installation is much easier when everything is measured in advance. Start by measuring the height of your wall and cutting panels with an extra 2–3 inches at the top and bottom. This gives you room to trim cleanly.
Next, use a level or plumb line to draw a straight vertical guideline where your first panel will go. Walls are rarely perfectly straight, and this line keeps the pattern aligned as you work across the room.
Helpful planning tips:
- Always start in a less noticeable corner
- Match patterns on the floor before hanging
- Label panels lightly on the back to keep order
[Image Prompt] Wallpaper panels laid out flat on the floor with a repeating pattern carefully aligned, measuring tape and pencil nearby, realistic DIY setup.
Taking ten extra minutes here can save hours of fixing mistakes later.
Apply Adhesive the Right Way
Different wallpapers use different adhesives, so always check the manufacturer’s instructions. Some wallpapers are pre-pasted and only need water, while others require paste applied to the wall or the back of the paper.
General adhesive tips:
- Use a roller for even coverage
- Avoid thick globs near edges
- Don’t over-saturate the paper
If you’re using paste, apply it evenly and let the paper “relax” for the recommended time. This prevents shrinking once it’s on the wall, which is a common cause of gaps and bubbles.

Hang the First Panel with Care
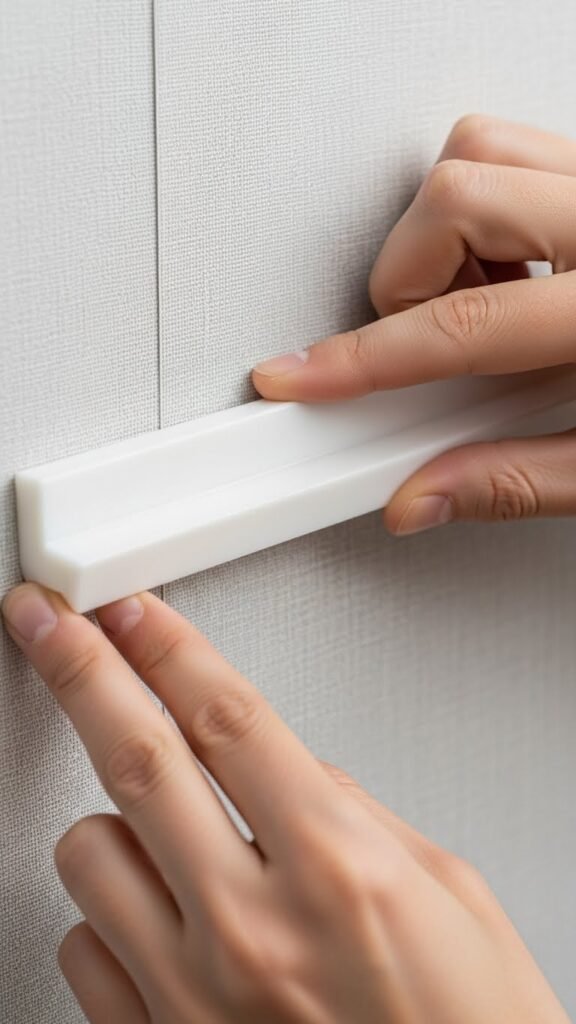
The first panel sets the tone for the entire wall. Align it carefully with your guideline and press it lightly into place from top to bottom.
Work slowly:
- Smooth from the center outward
- Use a smoothing tool or soft cloth
- Push air bubbles gently toward the edges
If a bubble appears, don’t panic. Lift the paper slightly and smooth it back down. Wallpaper is forgiving when handled early.
Trim excess at the ceiling and baseboard with a sharp utility knife for crisp edges.
Match Seams and Remove Bubbles as You Go
When adding the next panel, focus on seam alignment. Patterns should line up naturally without stretching the paper. Butt seams gently—never overlap unless the wallpaper instructions say otherwise.
To keep things neat:
- Wipe excess paste immediately with a damp sponge
- Smooth each panel fully before moving on
- Step back often to check alignment
Small bubbles usually disappear as the wallpaper dries, but larger ones should be smoothed out right away.
Let It Dry and Finish Strong
Once all panels are up, resist the urge to touch or adjust them repeatedly. Let the wallpaper dry naturally with good airflow, but avoid strong fans or open windows that can cause edges to lift.
After drying:
- Check corners and seams
- Apply a tiny bit of adhesive if needed
- Trim any missed edges carefully
Stand back and enjoy the transformation. A smooth wallpaper finish instantly makes a space feel intentional and styled.
Final Takeaway
Installing wallpaper without bubbles or mess is all about patience, prep, and working one step at a time. When you slow down and follow a plan, the process feels surprisingly manageable—and even enjoyable.
Save this guide for later, grab your tools, and turn that blank wall into a statement you’ll love every day.

Leave a Reply