
Building a sliding barn door is a fantastic way to add rustic charm to your home without breaking the bank. Whether you’re upgrading a closet, creating a statement piece in your living room, or need a stylish solution for a bathroom, a barn door is an affordable and stylish option. Plus, the best part? You can make it yourself with just a few tools and materials, all while keeping your budget in check.
[Image Prompt] A cozy home interior featuring a sliding barn door as the focal point, with natural wood tones and soft lighting creating a warm atmosphere.
Materials You’ll Need
Before you get started, gather your materials. These are simple and affordable items that you can find at most hardware stores:
- Wood for the door: You can use reclaimed wood for a more rustic look or plywood for a smoother finish. Depending on your design preference, the wood can be stained or painted to match your décor.
- Sliding hardware kit: These kits usually include the rail, rollers, and necessary mounting hardware.
- Screws and anchors: You’ll need screws to mount the rail and anchors to support the weight of the door.
- Tools: A drill, measuring tape, level, saw (if you need to cut the wood), and a screwdriver.
- Finish: Stain, paint, or polyurethane to protect and enhance the look of your barn door.
[Image Prompt] A workbench with a saw, drill, wood planks, and other tools neatly arranged for crafting a barn door.
Step-by-Step Guide to Building Your Sliding Barn Door
1. Measure the Doorway
First things first: measure your doorway to determine the size of your barn door. Take into account the height and width of the opening, ensuring that the door will fully cover the space. It’s a good idea to make the door a little wider than the frame for a better aesthetic.
- Tip: Consider the space around the door. Will the door slide open and closed freely, or will it need to clear any furniture or obstructions?
[Image Prompt] A person measuring a doorway with a tape measure, carefully noting down the dimensions for the sliding barn door.
2. Cut the Wood to Size
Now it’s time to cut your wood to the desired dimensions. If you’re using reclaimed wood, you might not need to cut much, but if you’re using plywood, measure and cut it to fit the doorway. You can opt for a single panel or a multi-paneled design depending on your style.
- Tip: For a more rustic feel, keep the edges rough or distressed for added character. Sand the surface lightly for a smoother finish.
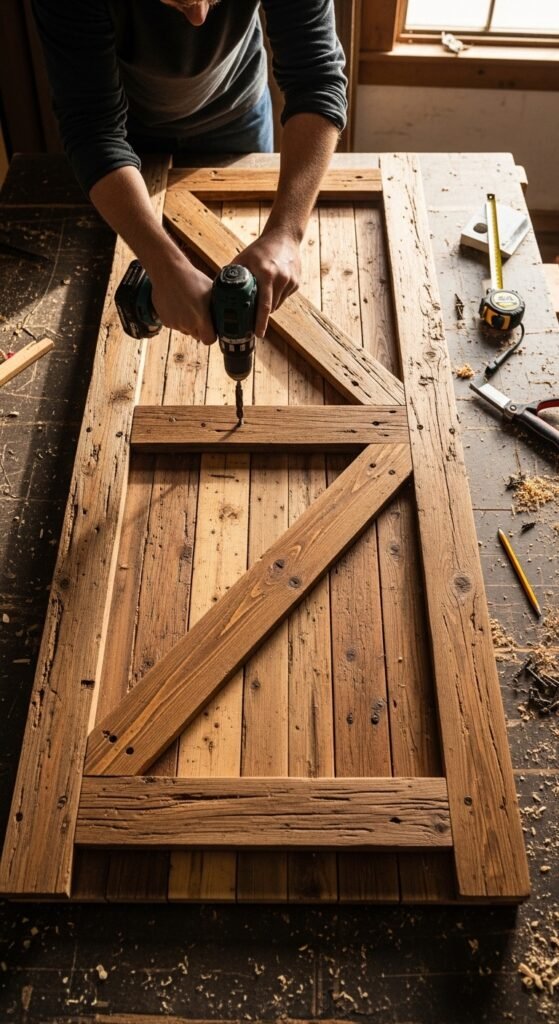
3. Assemble the Door
Once your wood is cut, it’s time to assemble the door. Lay the pieces flat on the ground and arrange them in the desired pattern. For a traditional barn door look, consider using horizontal slats or a chevron pattern.
- Tip: Use wood glue along the edges before securing the pieces together with screws for extra strength.
4. Install the Sliding Hardware
With the door assembled, it’s time to install the sliding hardware. Attach the rail to the top of the doorway, ensuring that it is level and securely mounted to the wall. Most kits come with wall anchors, but you may need to install additional support if your wall is not solid enough.
- Tip: Check the hardware kit to ensure it comes with all the necessary parts, including the rollers, rail, and mounting brackets. If not, they are easy to find at most hardware stores.

5. Hang the Barn Door
Once the hardware is in place, hang the barn door by attaching the rollers to the top of the door. Carefully lift the door onto the rail and test the sliding mechanism. Make sure the door slides smoothly and without resistance.
- Tip: You might need to adjust the height of the door using the roller brackets to make sure the door doesn’t scrape the floor.
6. Finish the Door
Finally, apply your chosen finish to the door. Whether you prefer a rich stain, a bright coat of paint, or a simple protective polyurethane, make sure to let the finish dry fully before using the door.
- Tip: If you’re aiming for a weathered look, use a light sanding technique to give the door an aged, distressed appearance. This will add more character and charm to the door.
[Image Prompt] A person staining a barn door with a rich wood finish, brushing the surface with careful strokes to ensure an even coat.
Final Thoughts
Building a sliding barn door is a budget-friendly project that can completely transform your space. With just a few basic tools, some wood, and a sliding hardware kit, you can create a stylish focal point for any room. And remember, this is a customizable project—feel free to get creative with colors, finishes, and designs to match your home’s unique style.
Take the time to measure, cut, and assemble carefully, and you’ll have a beautiful barn door that’s both functional and aesthetically pleasing. Don’t forget to share your finished project with your friends—after all, who doesn’t love a good DIY success story?
[Image Prompt] A finished barn door hanging beautifully in a modern home interior, complementing the room’s rustic design elements.

Leave a Reply