
If you’ve ever spotted those cute, fluffy Christmas gnomes in stores and thought, “I want these… but I bet I can make them myself!” — you’re absolutely right. DIY Christmas gnomes are surprisingly simple, budget-friendly, and ridiculously fun to craft. They add instant coziness to mantels, shelves, kitchen counters, and entryways, and they’re perfect for gifting too.
Let’s walk through how to make your own charming Christmas gnomes using everyday supplies — no sewing machine required!
Gather Your Simple, Budget-Friendly Supplies
You don’t need fancy materials to make gnomes. Most items can be found at dollar stores, craft shops, or even inside your home.
Basic Supplies You’ll Need:
- A sock (preferably a thick, soft crew sock)
- Rice or poly pellets for weight
- Hot glue gun
- Faux fur fabric
- Wooden bead or small round pom-pom (for the nose)
- Decorative hat or patterned sock for the gnome hat
- Rubber bands or string

Using simple materials keeps the project affordable and kid-friendly. Once you know the basics, you can create a whole family of gnomes with different colors and styles.
Step 1: Create the Gnome Body Base
Start by making the weighted body — this helps your gnome stand without wobbling or collapsing.
- Open your sock and fill the bottom half with rice or poly pellets.
- Gently shape the filled sock into a rounded body.
- Tie the top with a rubber band to keep everything secure.
- Trim any excess fabric if needed.
Short steps like this make the process smooth and beginner-friendly. You can make the body larger or smaller depending on the size of the sock and how much filling you use.

Step 2: Cut and Attach the Gnome Beard
The beard is the star of your Christmas gnome — fluffy, soft, and full of character.
How to Make the Beard:
- Lay your faux fur fabric face down.
- Draw a U-shape or triangle for the beard, depending on the style you want.
- Cut from the back so the fur stays long and natural.
- Glue the beard to the front of the gnome body.
Keep the beard simple or go fuller for a dramatic look. The key is cutting from the backing fabric to avoid chopping off the texture.
Step 3: Add the Adorable Nose
Once the beard is attached, it’s time to place the signature round gnome nose.
- Use a small wooden bead, felt ball, or fuzzy pom-pom.
- Glue it right at the top center of the beard.
- Hold for a few seconds to secure.
The nose instantly brings your gnome to life!
Step 4: Make and Attach the Hat
The hat is where you can get playful with colors and textures.
Hat Ideas:
- Use a patterned fuzzy sock
- Make a hat from felt
- Use knit fabric scraps
- Add tiny embellishments like bells, pom-poms, or greenery
Slip the hat over the top of the gnome’s head, covering the top portion of the nose for that classic cozy look. Glue lightly around the edges so it stays in place.

Step 5: Customize With Cute Extras
This is the moment where your creativity can shine. Add little touches to make each gnome unique.
Popular Add-Ons:
- Mini Christmas ornaments
- Felt arms holding a tiny gift
- Faux greenery tucked into the hat
- A long braid if you’re making a girl gnome
- Buttons, ribbons, or tiny snowflakes
You can make themed gnomes too—snowy white, traditional red-and-green, farmhouse neutrals, or even pastel holiday hues.
Step 6: Style Your Gnomes Around the Home
Once your gnomes are done, you’ll want to display them everywhere.
Cute Places to Showcase Them:
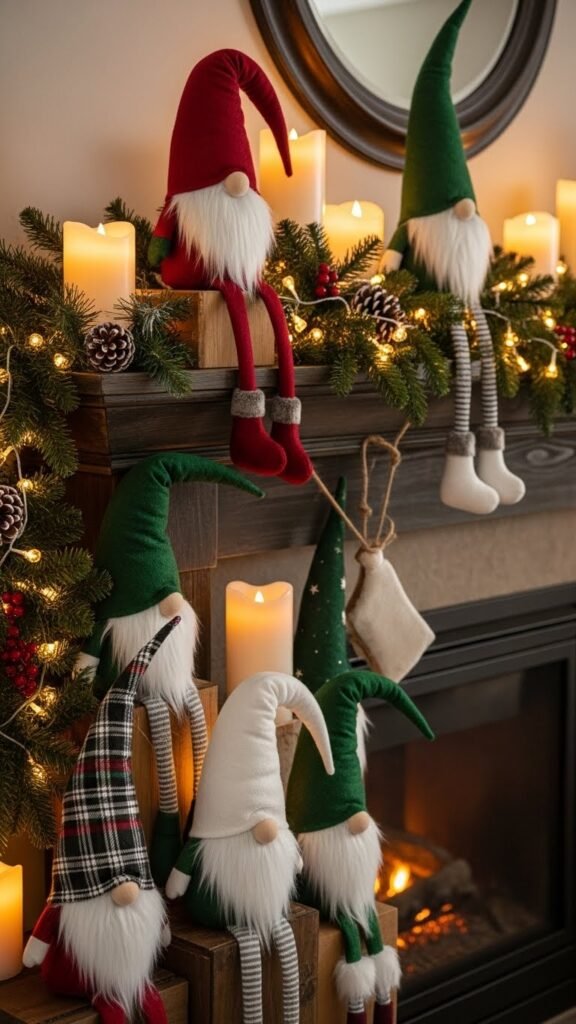
- On a mantel with garland
- On entryway tables
- Beside your Christmas tree
- On kitchen shelves
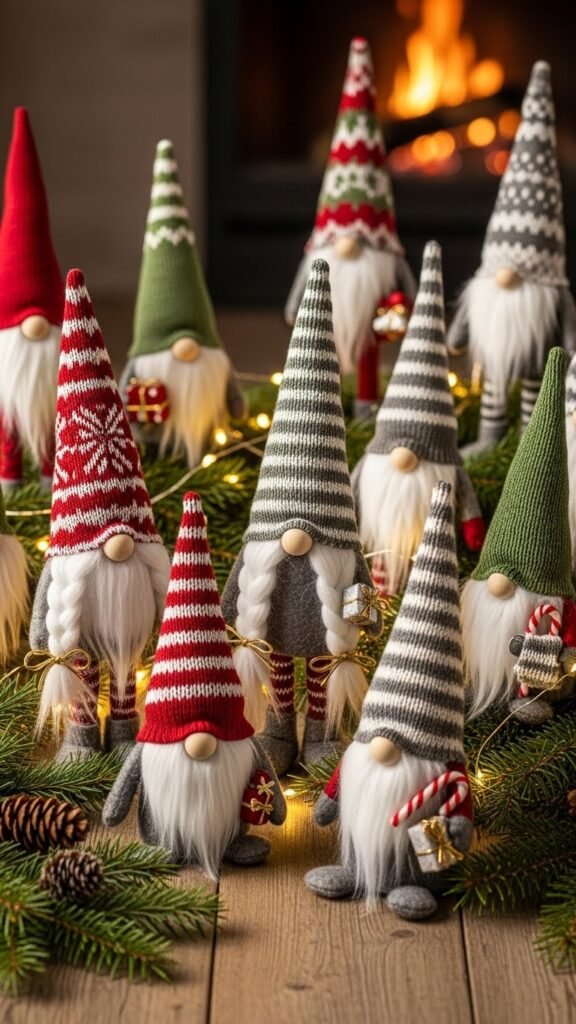
- In a centerpiece tray with candles and pine cones
Their charm works beautifully with rustic, farmhouse, modern, or Scandinavian décor.
Tips to Make Your Gnomes Extra Cute
- Mix different textures like knit, faux fur, and felt.
- Add weight at the bottom so they stand tall.
- Use truly fluffy faux fur for the best beard look.
- Choose coordinated color palettes for groups of gnomes.
- Make multiple sizes (small, medium, tall) for a layered display.
Final Takeaway
DIY Christmas gnomes are not only adorable — they’re incredibly easy, relaxing, and customizable. With just a few simple supplies, you can create festive decorations that feel warm, handmade, and full of personality.
If you love holiday crafting, save this idea for later and start building your own little gnome family!

Leave a Reply