
Creating your own Christmas centerpiece is one of the easiest ways to bring instant holiday magic to your dining room. Whether you love classic greenery, cozy candlelight, or modern metallic accents, a handmade centerpiece adds warmth and personality to your festive table. Even better—it’s simple, affordable, and completely customizable.
In this guide, you’ll learn step-by-step how to build a gorgeous DIY Christmas centerpiece using easy-to-find materials—and a few clever styling tips to make it look professionally designed.
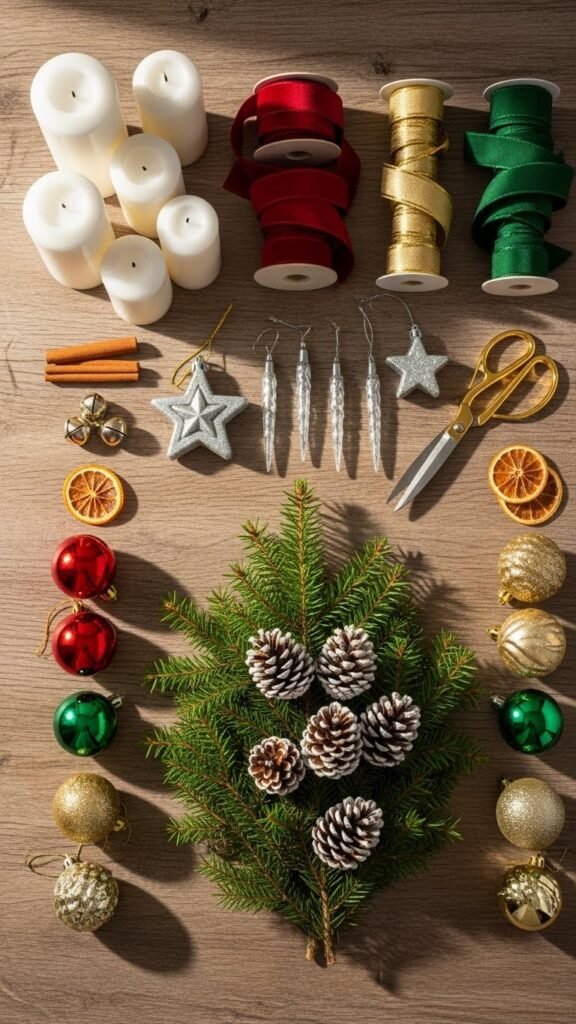
Gather Your Essential Materials
Before you start crafting, make sure you have everything you need. Most items can be found at craft stores, garden shops, or even in your backyard.
- Fresh or faux evergreens
- Pinecones
- Pillar or LED candles
- A tray, wooden board, or table runner
- Ornaments or decorative accents
- Ribbon, twine, or decorative fabric
Choosing the right base helps you build a centerpiece that feels balanced and intentional. Rectangular trays create structure, while boards or runners allow for a looser, more natural look.
Step 1: Create a Greenery Foundation
Start with your evergreens—these form the backbone of your centerpiece. You can mix different textures, such as:
- Fir
- Eucalyptus
- Cedar
- Spruce
Lay the greenery in a loose, flowing shape down the table. Let some pieces extend naturally off the edges to create movement.
For a fuller look, layer in shorter stems underneath longer branches. This adds height without making your centerpiece too bulky.

Tip: If you’re using fresh greenery, mist it lightly every day to keep it looking vibrant.
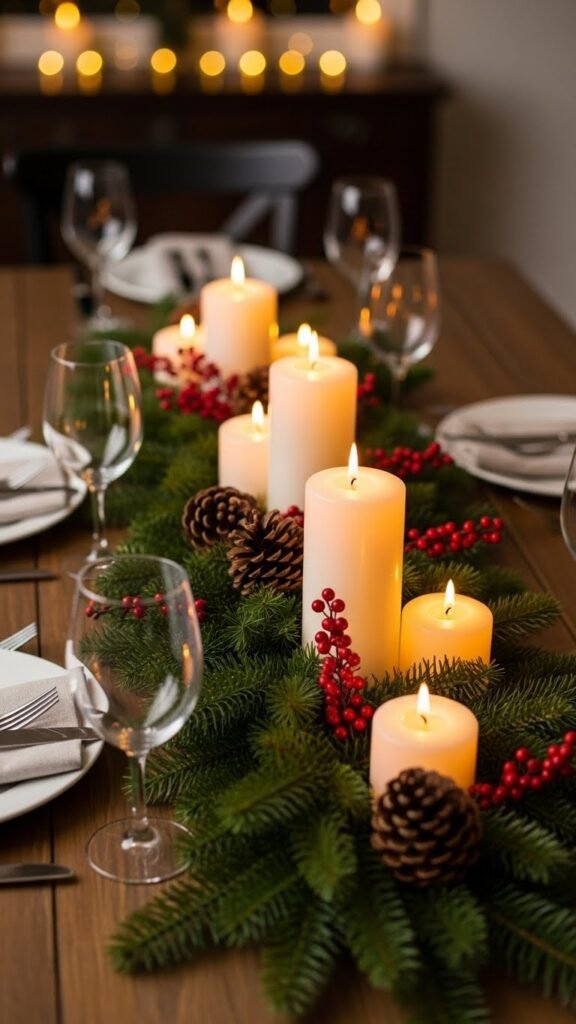
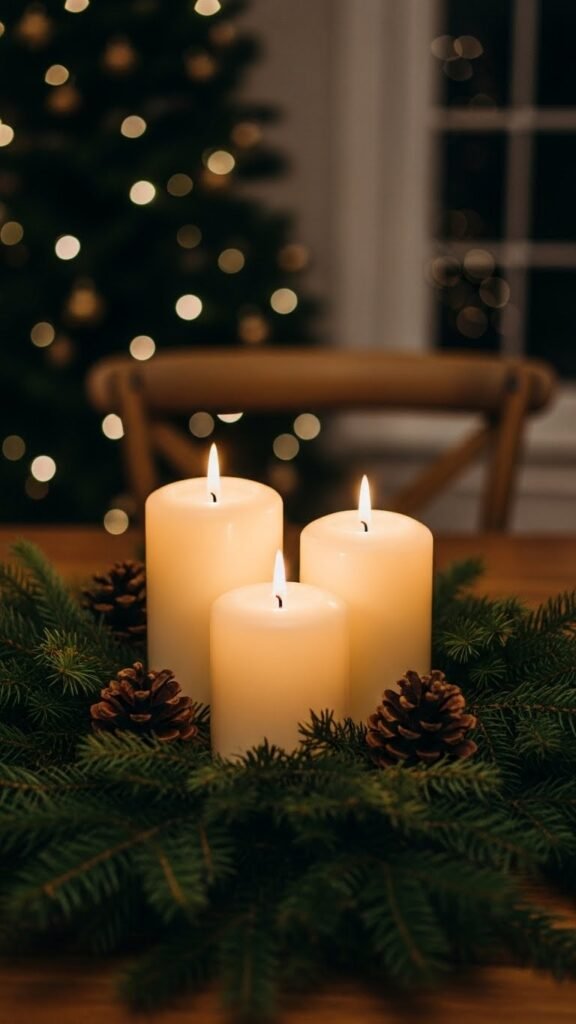
Step 2: Add Candles for Warmth and Glow
Candles create that soft, magical holiday atmosphere everyone loves. Choose colors that complement your theme—classic white, deep green, or even soft gold.
Place the candles in groups of one, two, or three depending on their size. Make sure they sit securely and aren’t too tall (you still want to see people across the table!).
- Use LED candles if you want a worry-free glow.
- Mix candle heights for a dynamic look.
- Add glass holders for an elegant touch.
Step 3: Layer in Decorative Accents
Now comes the fun part—decorating! This is where your centerpiece starts to shine.
Here are some easy ideas:
- Pinecones: Add instant texture and a cozy woodland feel.
- Ornaments: Use matte, metallic, or glittered ornaments to match your theme.
- Berries: Red or white faux berries add pops of color.
- Ribbon: Weave a thin ribbon through the greenery for a soft, elegant touch.
Scatter accents naturally rather than lining them up. This keeps your centerpiece feeling organic, not rigid.
Step 4: Add Height and Movement
To give your centerpiece a designer look, play with height variation.
Try adding:
- Mini trees
- Taper candles
- Tall twigs or branches
- A few ornament clusters set slightly higher
Just be sure the arrangement doesn’t block conversation across the table.
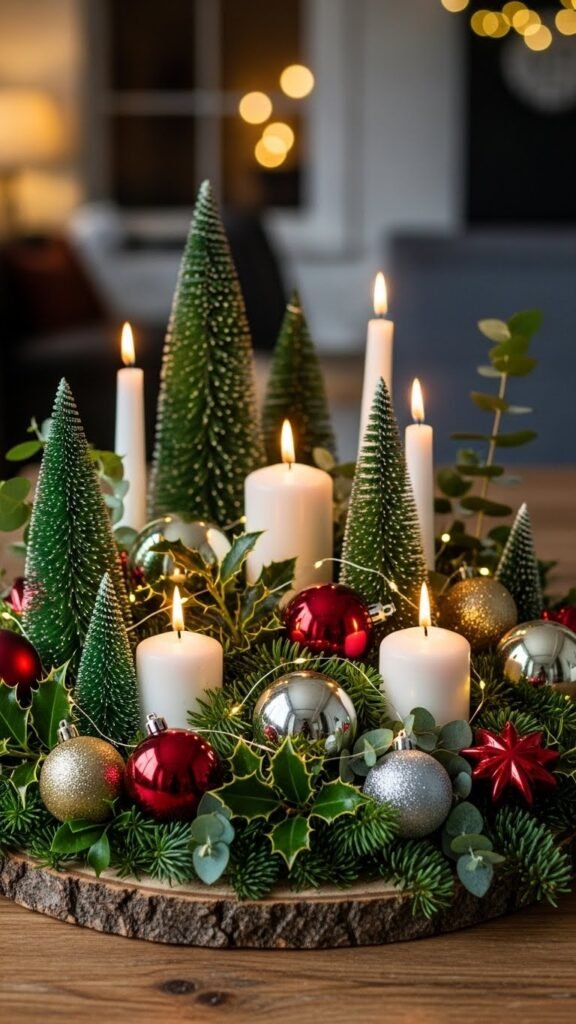
This step creates dimension and gives the entire centerpiece a professionally styled finish.
Step 5: Finish with a Personal Touch
Personalization is what makes your DIY centerpiece truly special. Add elements that reflect your home style:
- A special ornament that’s meaningful
- A handmade ribbon bow
- Vintage candleholders
- Small framed holiday messages
- Mini holiday figurines
You can also tailor your centerpiece to different themes:
- Rustic: Burlap, wooden accents, natural pinecones
- Modern: Monochrome ornaments, sleek candleholders
- Classic: Red berries, gold accents, lush greenery
Helpful Tips for a Long-Lasting Centerpiece
Keep your centerpiece looking fresh and stylish throughout the season with these simple tips:
- Choose LED candles for safety during long dinners.
- Avoid scented candles—they can overpower the aroma of your meal.
- Keep the centerpiece low enough for easy conversation.
- Refresh greenery every 5–7 days if using fresh branches.
- Use a tray or board for easy lifting and cleaning.
Final Thoughts
Building your own Christmas centerpiece is not only simple—it’s incredibly rewarding. You get a beautiful dining table display and a festive atmosphere that feels personal and heartfelt.
Whether you prefer rustic charm or elegant sparkle, these steps help you create a centerpiece that makes your holiday gatherings unforgettable.
Save this idea for later and build your own magical Christmas centerpiece this season!

Leave a Reply