
Looking to give your kitchen a fresh, stylish update without breaking the bank? Installing a tile backsplash is an easy and affordable way to enhance the visual appeal of your space. Whether you’re aiming for a modern, sleek look or a rustic farmhouse vibe, a tile backsplash can elevate your kitchen’s design in no time. Plus, it’s a DIY-friendly project that anyone with a little patience and the right tools can accomplish.
[Image Prompt] A beautifully tiled kitchen backsplash in shades of white and gray, reflecting natural light with a modern touch.
Step 1: Gather Your Materials and Tools
Before you dive into the installation process, gather everything you’ll need to ensure a smooth and successful project. Here’s your checklist:
- Tile of choice (glass, ceramic, subway, or mosaic tiles)
- Tile adhesive
- Tile spacers
- Tile cutter or wet saw
- Grout
- Grout sealer
- Level
- Tape measure
- Notched trowel
- Sponge and bucket
Pro Tip: Choose a backsplash tile that complements your kitchen’s overall aesthetic. Subway tiles are a classic choice, while mosaic and glass tiles can add a contemporary flair.
Step 2: Prepare the Wall Surface
Proper preparation is key to a successful tile installation. Start by cleaning the wall surface where the backsplash will go. Remove any grease, dust, or grime to ensure the adhesive will bond properly. If you’re tiling over existing tiles, make sure they are clean and intact.

Once cleaned, use a level to ensure the wall is even. Any imperfections in the wall can affect the alignment of your tiles, so be sure to correct any issues before proceeding.
Step 3: Apply Tile Adhesive
Now, it’s time to apply the tile adhesive. Using a notched trowel, spread the adhesive evenly on the wall, working in small sections (about 2-3 square feet). Make sure you only apply enough adhesive for a few tiles at a time to avoid it drying out before you can place the tiles.
[Image Prompt] A notched trowel applying adhesive to a kitchen wall, creating smooth grooves for tile placement.
The grooves created by the notched trowel will help the tiles adhere firmly to the wall and ensure a more secure bond. Remember to follow the manufacturer’s instructions on drying time.
Step 4: Lay the Tiles
Once the adhesive is in place, it’s time to start laying your tiles. Press each tile firmly into the adhesive, leaving a small gap between them for grout. Use tile spacers to maintain consistent spacing between the tiles.
Start from the center of the wall or a corner, depending on your preference. For straight, clean lines, be sure to check the alignment of the tiles using a level as you go.
Pro Tip: If you’re working with mosaic tiles, be extra cautious when cutting them to fit around outlets or corners. A wet saw or tile cutter will come in handy for this step.
Step 5: Cut Tiles to Fit
Once you reach the edges or any outlets, you’ll need to cut tiles to fit. Measure the remaining spaces and use a tile cutter or wet saw to cut the tiles to the right size. Take your time with this step, as precision is key to ensuring a polished finish.
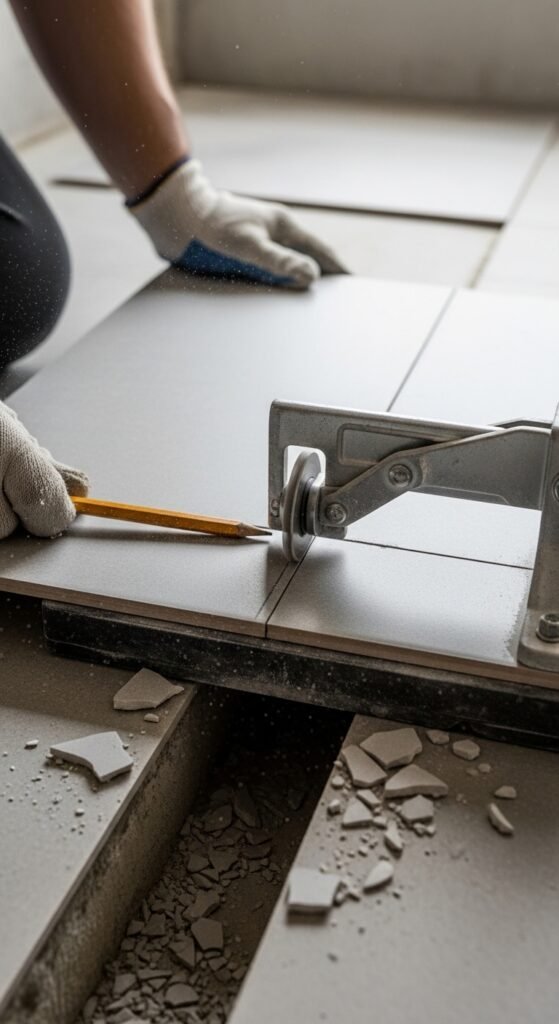
When cutting, always wear protective goggles and gloves to avoid injury from broken tile edges. Dry-fit the tiles in place before applying adhesive to make sure they fit perfectly.
Step 6: Apply Grout
Once the adhesive has dried (usually about 24 hours), it’s time to apply the grout. Use a grout float to spread the grout over the tiles, making sure to fill all the gaps between them. Work in small sections to avoid the grout setting before you can clean it off.
After you’ve applied the grout, let it sit for a few minutes before using a damp sponge to wipe away excess grout. Rinse the sponge frequently to avoid spreading grout into the spaces between tiles.
Pro Tip: Make sure to smooth out the grout lines as you go for a more professional, seamless finish.
Step 7: Seal the Grout
After the grout has dried (usually 24-48 hours), it’s important to seal it to prevent stains and damage from moisture. Apply a grout sealer with a small applicator or sponge and allow it to dry completely before using the kitchen.
[Image Prompt] A grout sealer being applied to freshly grouted tile, with a clean sponge nearby to wipe excess off.
Step 8: Enjoy Your New Backsplash
Once everything is dry and sealed, step back and admire your work. Your kitchen now has a brand-new backsplash that will impress family and friends alike. This simple upgrade can completely transform the look and feel of your kitchen without the high price tag of a professional remodel.
Final Thoughts
Installing a tile backsplash is a simple yet effective way to enhance your kitchen’s look. With the right tools and a little patience, you can tackle this DIY project and give your kitchen a fresh, updated look. Don’t forget to take your time with each step, and remember, a little precision goes a long way.
Save this guide for your next kitchen makeover, and enjoy the satisfaction of creating a space that’s not only functional but also visually stunning!
Call-to-Action: Ready to take on your own tile backsplash project? Gather your materials and start transforming your kitchen today!

Leave a Reply