
Creating Christmas wall art is one of the easiest ways to transform your home into a warm, joyful holiday space. Whether you’re decorating a living room, hallway, kitchen nook, or even a bedroom, DIY pieces add personality and charm that store-bought décor just can’t match. Plus, most projects are simple, budget-friendly, and beginner-friendly.
In this guide, you’ll learn exactly how to craft festive wall décor that stands out—from choosing materials to styling your final masterpiece. Let’s start building a holiday display that truly pops.
Gather Your Supplies: Simple Materials That Make a Big Impact
You don’t need fancy tools or professional art skills. A few everyday items can help you create beautiful Christmas wall pieces that look polished and intentional.
Basic Supplies to Have on Hand
- Picture frames (wood, gold, or minimalist)
- Craft paper, cardstock, or canvas panels
- Hot glue gun
- Faux greenery, berries, or pinecones
- Ribbon or twine
- Acrylic paint in festive colors
- Scissors and tape
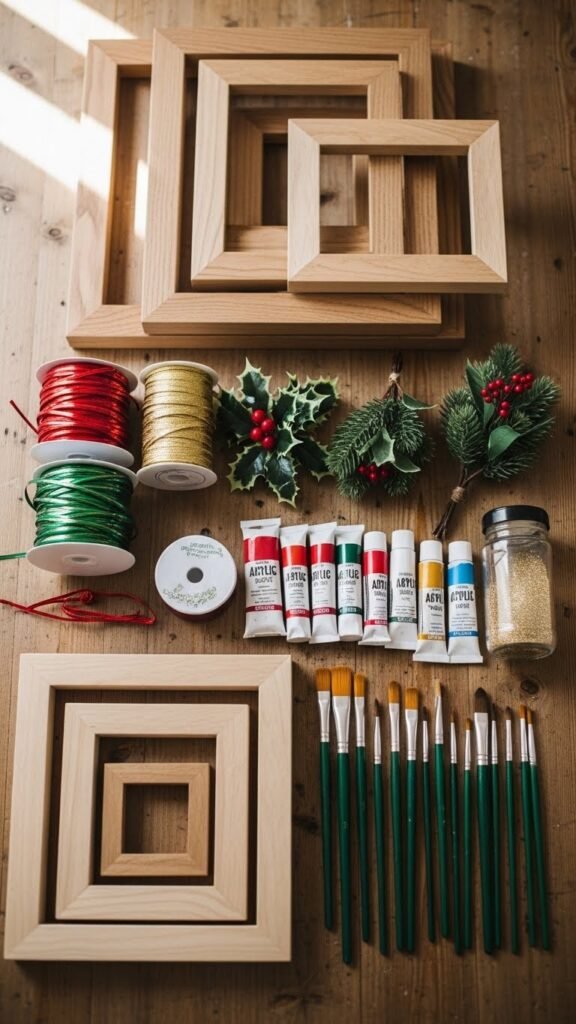
When gathering supplies, stick to a color palette that matches your existing holiday décor. A few consistent shades—like deep green, white, and metallic gold—instantly make your art look cohesive.
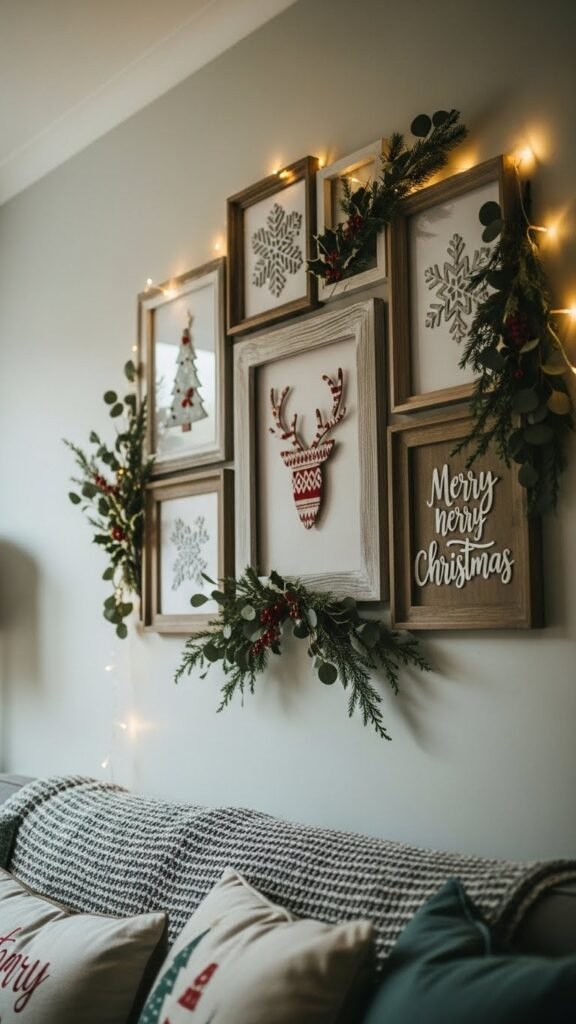
Create a Simple and Stunning Holiday Frame Arrangement
One of the easiest ways to make impactful wall art is by decorating the inside of a frame without adding too many elements. Think minimal, clean, and seasonal.
Step-by-Step: Modern Christmas Frame Art
- Choose a frame with a wide border for a bold look.
- Insert a piece of textured craft paper or canvas as the background.
- Hot glue a small cluster of faux greenery and berries to one corner.
- Add a ribbon bow or twine for a rustic touch.
- Hang it solo—or mix multiple frames for a gallery-style display.
This project is perfect for quick decorating because you can make several variations in under an hour. Keep colors consistent and vary sizes to add visual interest.
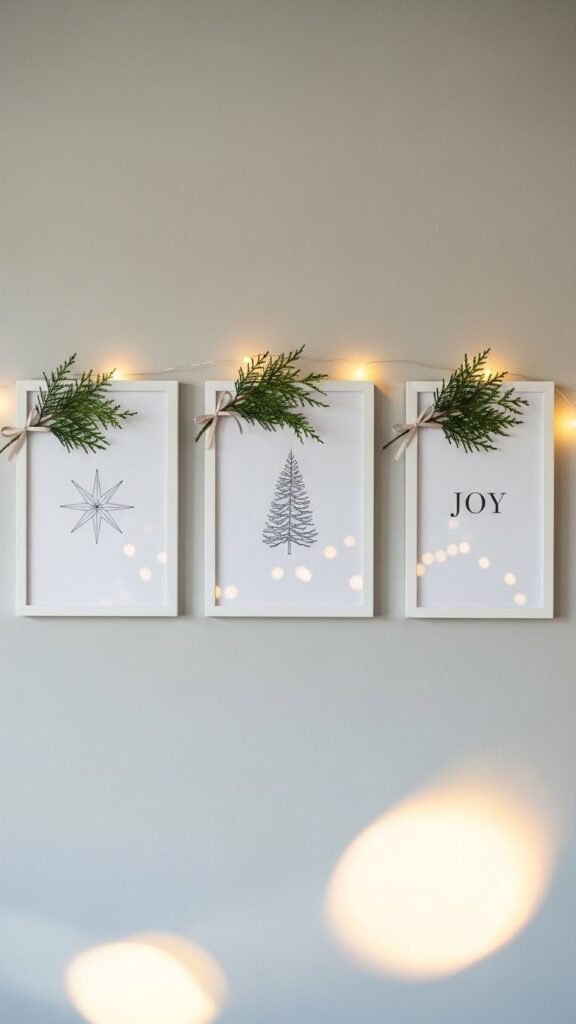
Build a Festive Christmas Quote Sign (Without Any Lettering on Images)
If you love farmhouse, cottage, or Scandinavian décor, a handmade quote sign is the ideal wall piece. Instead of printing text, you can create shapes and patterns that represent the theme of the quote.
How to Craft a Decorative Pattern Sign
- Paint your canvas or board in a neutral winter shade like cream or warm gray.
- Use painter’s tape to create geometric shapes or a repeating pattern that complements holiday colors.
- Add faux greenery or a tiny wreath to the top edge of the sign to enhance the theme.
- Display it near your entryway, mantel, or dining area for a welcoming effect.
This approach offers the cozy charm of a holiday sign without requiring typography or digital skills. The patterns still give the message of festivity—clean, modern, and cheerful.
Make a DIY Christmas Wreath Frame That Doubles as Wall Art
A wreath doesn’t have to hang on a door—try turning it into framed wall décor instead. The frame acts like a spotlight, instantly elevating the wreath from simple greenery to statement art.
How to Assemble a Framed Wreath
- Choose a large open-backed frame. Leave out the glass.
- Create or buy a small wreath made of faux pine, eucalyptus, or berries.
- Hang the wreath inside the frame using ribbon.
- Add small decorative touches like bells, dried oranges, or mini ornaments.
This technique adds beautiful dimension and texture to a plain wall. It’s also easy to swap out wreaths year after year, keeping your décor fresh.
Craft Textured Christmas Wall Art Using Fabric Scraps
Fabric adds warmth, softness, and a handmade feel to any Christmas wall display. If you sew or craft regularly, you probably already have extra pieces at home.
Easy Fabric Scrap Art Ideas
- Cut fabric into tree shapes, stars, or ornament silhouettes.
- Layer different patterns—plaid, linen, felt, or gold metallic—for depth.
- Arrange and glue the shapes onto cardstock or stretched canvas.
- Frame the finished design or hang it with wooden poster rails.

Fabric art looks especially charming in farmhouse or hygge-inspired homes. The combination of textures brings quiet elegance and warmth to empty walls.
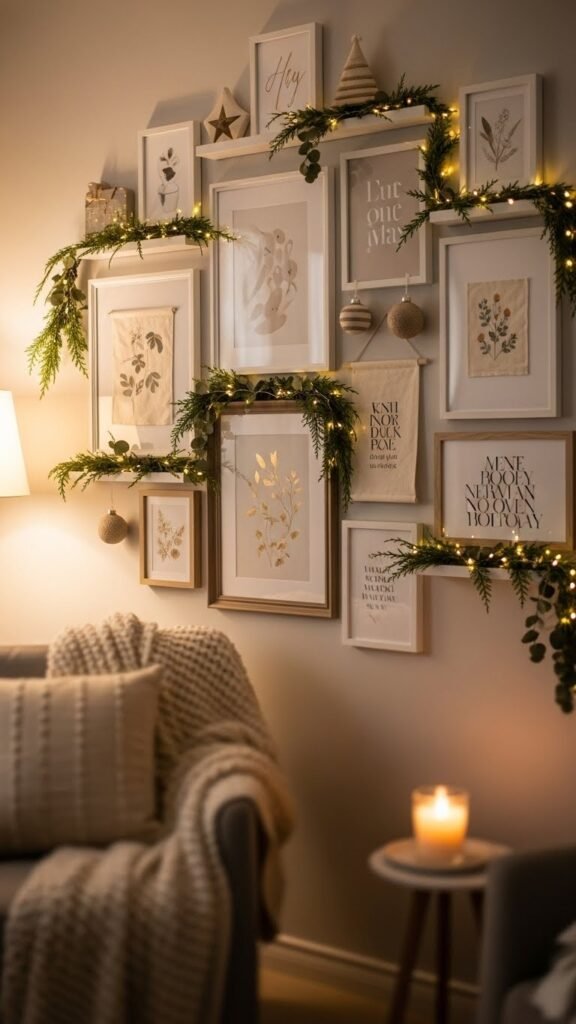
How to Style Your Finished Pieces for Maximum Impact
Once your wall art is ready, the final step is arranging and styling it in a way that makes the whole room feel festive. Placement matters just as much as the piece itself.
Tips for Beautiful Christmas Wall Displays
- Create a gallery wall: Mix frames, wreaths, fabric art, and greenery.
- Balance your layout: Place larger pieces in the center and smaller accents around them.
- Use lighting: Add fairy lights or soft lamps to highlight textures and shine.
- Keep things cohesive: Stick to 2–3 main colors so everything feels intentional.
Your wall should tell a visual story—warm, bright, and ready for the holidays.
Final Takeaway
Creating DIY Christmas wall art is one of the simplest ways to make your home feel joyful and personal. With a few affordable materials and a little creativity, you can craft pieces that look polished, cozy, and entirely unique. Save this guide so you can revisit these ideas anytime you’re ready to decorate—and share your creations with friends who love festive projects too!

Leave a Reply