
There’s something magical about counting down to Christmas, especially when kids get to open a tiny surprise each day. A handmade Advent calendar turns the whole month into a joyful experience—one that feels personal, thoughtful, and fun. The best part? You can craft one at home with simple, budget-friendly supplies.

In this guide, you’ll learn how to create a DIY Advent calendar that looks adorable, keeps kids excited all month long, and becomes a tradition they’ll always remember.
Gather Your Supplies & Pick a Style
Before you begin, choose the Advent calendar style that fits your family’s vibe. You can keep it rustic, colorful, minimal, or playful—anything works as long as it feels festive.
Popular Styles:
- Envelope Garland: Cute little envelopes clipped to twine.
- Mini Gift Boxes: Perfect for small toys or activity cards.
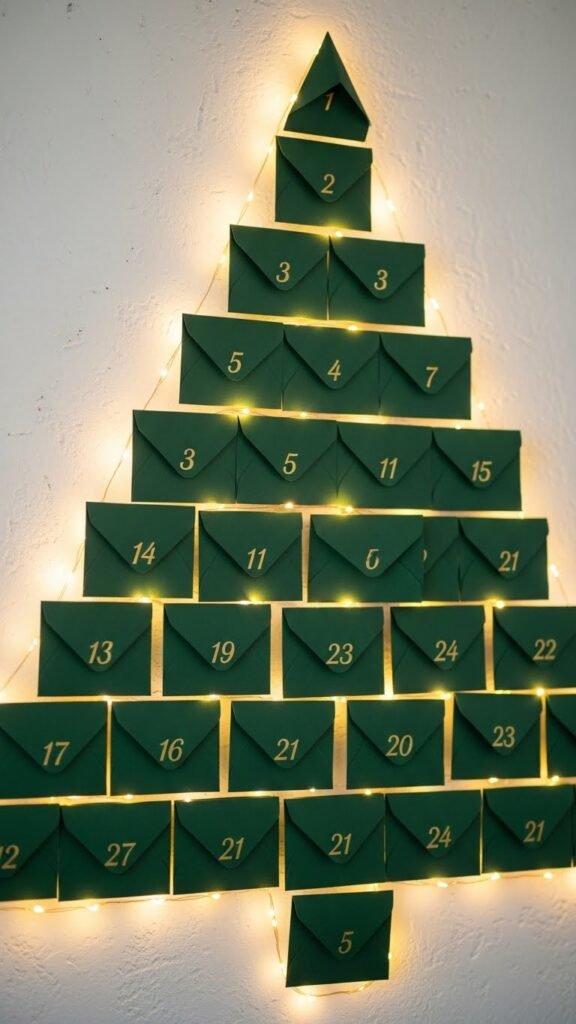
- Wall-Mounted Pockets: Fabric or paper pockets arranged like a tree.
- Hanging Buckets or Bags: Great for a bold farmhouse look.
Aim for supplies that are easy to handle and safe for kids.
Basic Supplies You May Need:
- Small envelopes, boxes, or cloth bags
- Number stickers or a marker
- Mini clothespins
- Twine, ribbon, or string
- Hole punch
- Washi tape
- Small goodies such as candies, stickers, tiny toys, notes, or activities
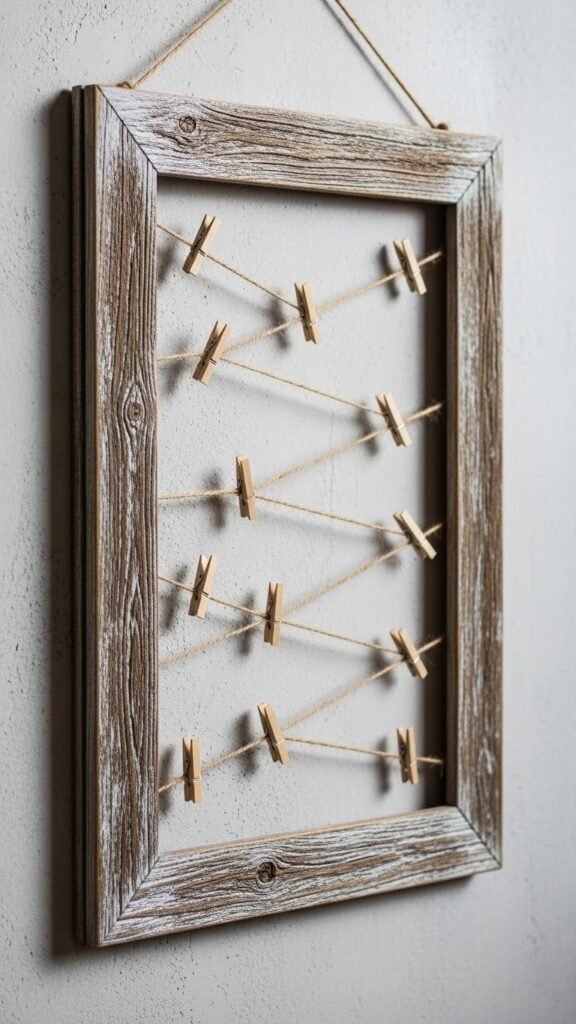
Step 1: Create Your Calendar Base
Your base is what holds the individual days together and sets the tone visually. Choose something sturdy and easy to display.
Options:
- A wooden frame or empty window frame
- A corkboard
- A branch (for a rustic woodland look)
- A shaped cutout like a tree, house, or star
Lay out your structure before attaching anything. This helps you see the overall spacing and styling.
Pro Tip: If your calendar will hang low, use soft materials so kids can safely reach each day’s surprise without knocking anything over.
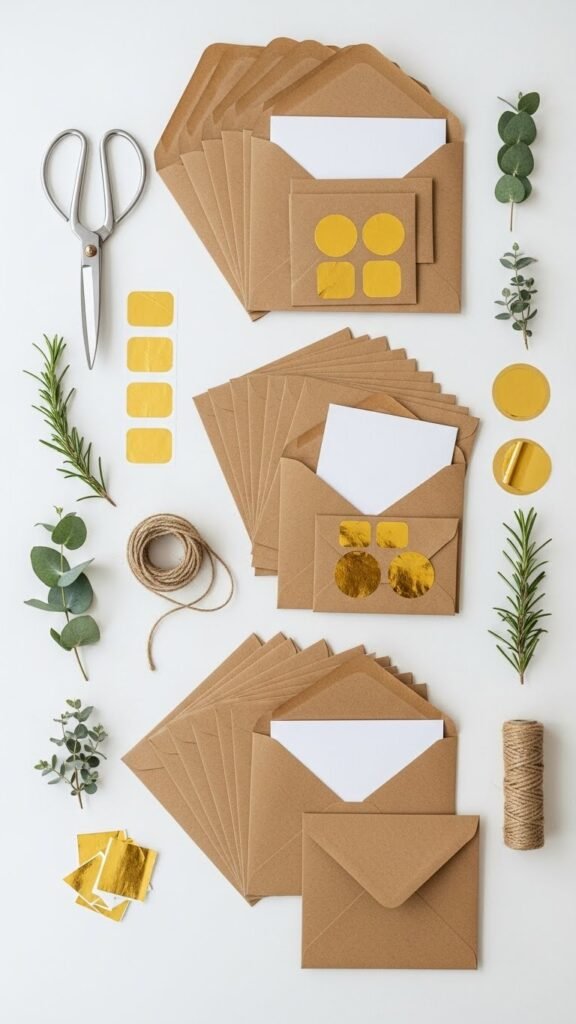
Step 2: Prepare Your 24 Containers
Once your base is ready, prepare the 24 small “doors” of your Advent calendar. These will hold your daily surprises.
Ideas for Each Day:
- Kraft envelopes
- Mini paper bags
- Tiny fabric pouches
- Small folding boxes
Number each one clearly so kids can easily find the right day.
Decorating Tips:
- Add greenery sprigs for a natural touch.
- Use washi tape for color without extra mess.
- Mix in metallic accents for a festive shine.
- Keep the designs simple if kids help decorate.

Step 3: Add the Surprises Inside
This part is the most fun! The contents don’t need to be expensive—just thoughtful and exciting. Mix in small treats, meaningful notes, and hands-on activities.
Filling Ideas:
- Holiday stickers
- Hot chocolate packets
- Tiny toys
- Small puzzle pieces (complete set by day 24!)
- Activity prompts like:
- “Make paper snowflakes today!”
- “Watch a Christmas movie together.”
- “Bake cookies after dinner.”
- Family challenge cards (kid-friendly and easy)
You can also create themed weeks such as crafts week, kindness week, or winter activity week.
Step 4: Assemble & Display Your Calendar
Now it’s time to bring everything together and hang up your creation.
For Garland Styles:
- Clip envelopes or bags to twine.
- Stagger the heights for visual interest.
- Add mini ornaments or bows between days.
For Box or Pouch Styles:
- Arrange them in rows or in the shape of a Christmas tree.
- Attach them with double-sided tape, twine loops, or clothespins.
- Add fairy lights around the frame for a magical glow.
Helpful Tip: Keep Day 24 extra special—a slightly larger bag or envelope makes that moment feel even more exciting.
Step 5: Personalize It for Your Kids
The beauty of a DIY Advent calendar is how customizable it is. Tailor it to your kids’ personalities, energy levels, and interests.
Personalization Ideas:
- Use their favorite colors.
- Add their initials to each bag.
- Use activities that fit your family routine.
- Give siblings their own color themes.
You can even let kids help decorate some parts while keeping the inside surprises a secret.
Step 6: Make It a Family Tradition
Once your Advent calendar is ready, make opening each day a moment your family looks forward to.
Make It Special:
- Open it together each morning or evening.
- Read daily notes aloud.
- Add small challenges like “Give someone a compliment today.”
- Display it in a spot where kids see it first thing.
As the days pass, your handmade calendar becomes more than décor—it becomes part of your family’s holiday memory.
Final Takeaway
Creating a DIY Christmas Advent calendar is easier than you think, and the joy it brings is truly priceless. With a few simple supplies, a bit of creativity, and a sprinkle of holiday spirit, you can craft something your kids will treasure year after year.
Save this idea for later and start building your own magical countdown!

Leave a Reply